So, here’s a video about NAS as standalone device that you can buy and use. Just add your storage and it works.
But there’s a lot of comments about building your own NAS using an old computer, because it’s much more easier and cheaper. So let’s build inexpensive PC to use as network attached storage.
What components should be used for building «home NAS»
It’s better to mention these steps:
- CPU (or motherboard’s chipset) with integrated graphics. No discrete videocard means no extra fan that produces extra noise. Yes, you can use silent videocard with passive cooling, but it costs money. And of course you can assemble PC without videocard at all, but not every motherboard will start without it.
- Choose small-form-factor mainboard, like mATX or mini-itx. The bigger — the better, but also it costs more. And we want to build cheap handmade NAS.
- Solid capacitors on mainboard. AFAIR solid capacitors was at the market when we had DDR3, it’s like 2010th. It’s OK to use regular capacitors, but solid ones looks more reliable.
- Choose CPU with lowest TDP. Make sure you’re gonna use the coolest CPU in model line. Use Celeron instead of Pentium. Use Athlon instead of Ryzen. CPU performance doesn’t matter in NAS, heating does.
- Don’t ever try to use any server-kind of equipment. All 1U-2U rackmount server-stuff is extremely noisy. .
- Use only 4-pin fans for cooling. 4-pin fans can be controlled automatically by motherboard, so choose mainboard with 4-pin connectors and use only 4-pin fans.
- The more SATA-connectors you have — the better. Four ports is minimum required: one for system-drive, two more for storage. Well, you can use only 2 ports with USB-boot.
- Gigabit Internet onboard. That’s not a problem actually, because gigabit network cards are in use since maybe 2000th.
- Get more storage drives with reasonable volume. If you can buy a pair of similar hard drives — it’s good, so you can use it for RAID. The more volumes you have — the better. And disk size doesn’t matter.
Best way to store information on NAS
We build low-cost NAS, so storage must be cheap. You can use domestic, home-oriented HDDs. No need to buy RAID-optimized or the fastest. In home-made NAS storage drives shouldn’t be expensive. Every manufacturer has it’s own «home-oriented» model line: Blue at Western Digital; Barracuda for Seagate and P300 for Toshiba. You can watch the video about hard disk drives specialization:
How many drives you should use for NAS
It depends on your needs, but I recommend to use at least three drives. As I mentioned in my post about archivation use «unique categoryzing» for all data. And now I will use this method for storage. That’s why I recommend to use at least three separate storages:
- Capacity of the first one can be just enough to store all your UNIQUE data. Most of the time this drive will idle, because…
- Second one should have more capacity to store ALL the data: UNIQUE and NON-UNIQUE. That’s where all read-write operations will take place. Of course, because of intensive usage this drive probably gonna die first. But there’s no worry, because all UNIQUE data stored in two different drives.
- Third one should have maximum capacity. There you can store all the data that should be read-only. I mean all software distributives, media collectoin etc.
Do you need RAID on your NAS or not
RAID array means wasting more money on storage for storing less data, if you’re home user. But if you have enough disk drives you can arrange RAID array and have your data mirrored on two drives. It’s a good idea for safe storing UNIQUE data. If you don’t have two drives with same specs — use periodical backup copying instead of RAID. And if you don’t store UNIQUE and essential data on NAS — you don’t need even backing up anything.
What to choose for building NAS: Windows or Linux
What operating system is better for NAS? Linux is less user-friendly and but can be installed on USB-stick to save one SATA-port. Windows gives more options, but requires better hardware. Of course you can run NAS on obsolete system like WinXP, but it’s insecure. NAS-oriented Linux distros don’t run any GUI and all setup goes through web-panel — so you can use «two-cores, two GB RAM» config to run this system. I use Windows because couldn’t find a way to get disk burning software run smoothly on console and run VMs. But if you want to save money and build NAS on poor components — get Linux, such as FreeNAS or OpenMediaVault.
How to build non-expensive PC-based NAS
 Motherboard for NAS — you can choose any. But it’s better to choose something that can NOT be user for building powerful gaming PC. So you can use something barely obsolete for gaming, but not too vintage with «overprice for age». For now it means something like LGA755 by Intel or AM2 by AMD with DDR2. It’s enough power for NAS. You can even try to build a NAS on DDR1 mainboard, but it’s outdated SATA-generation may be a problem. And of course you can use DDR3 or even DDR4 — it’s pretty «too much», but if you can afford it — why not?
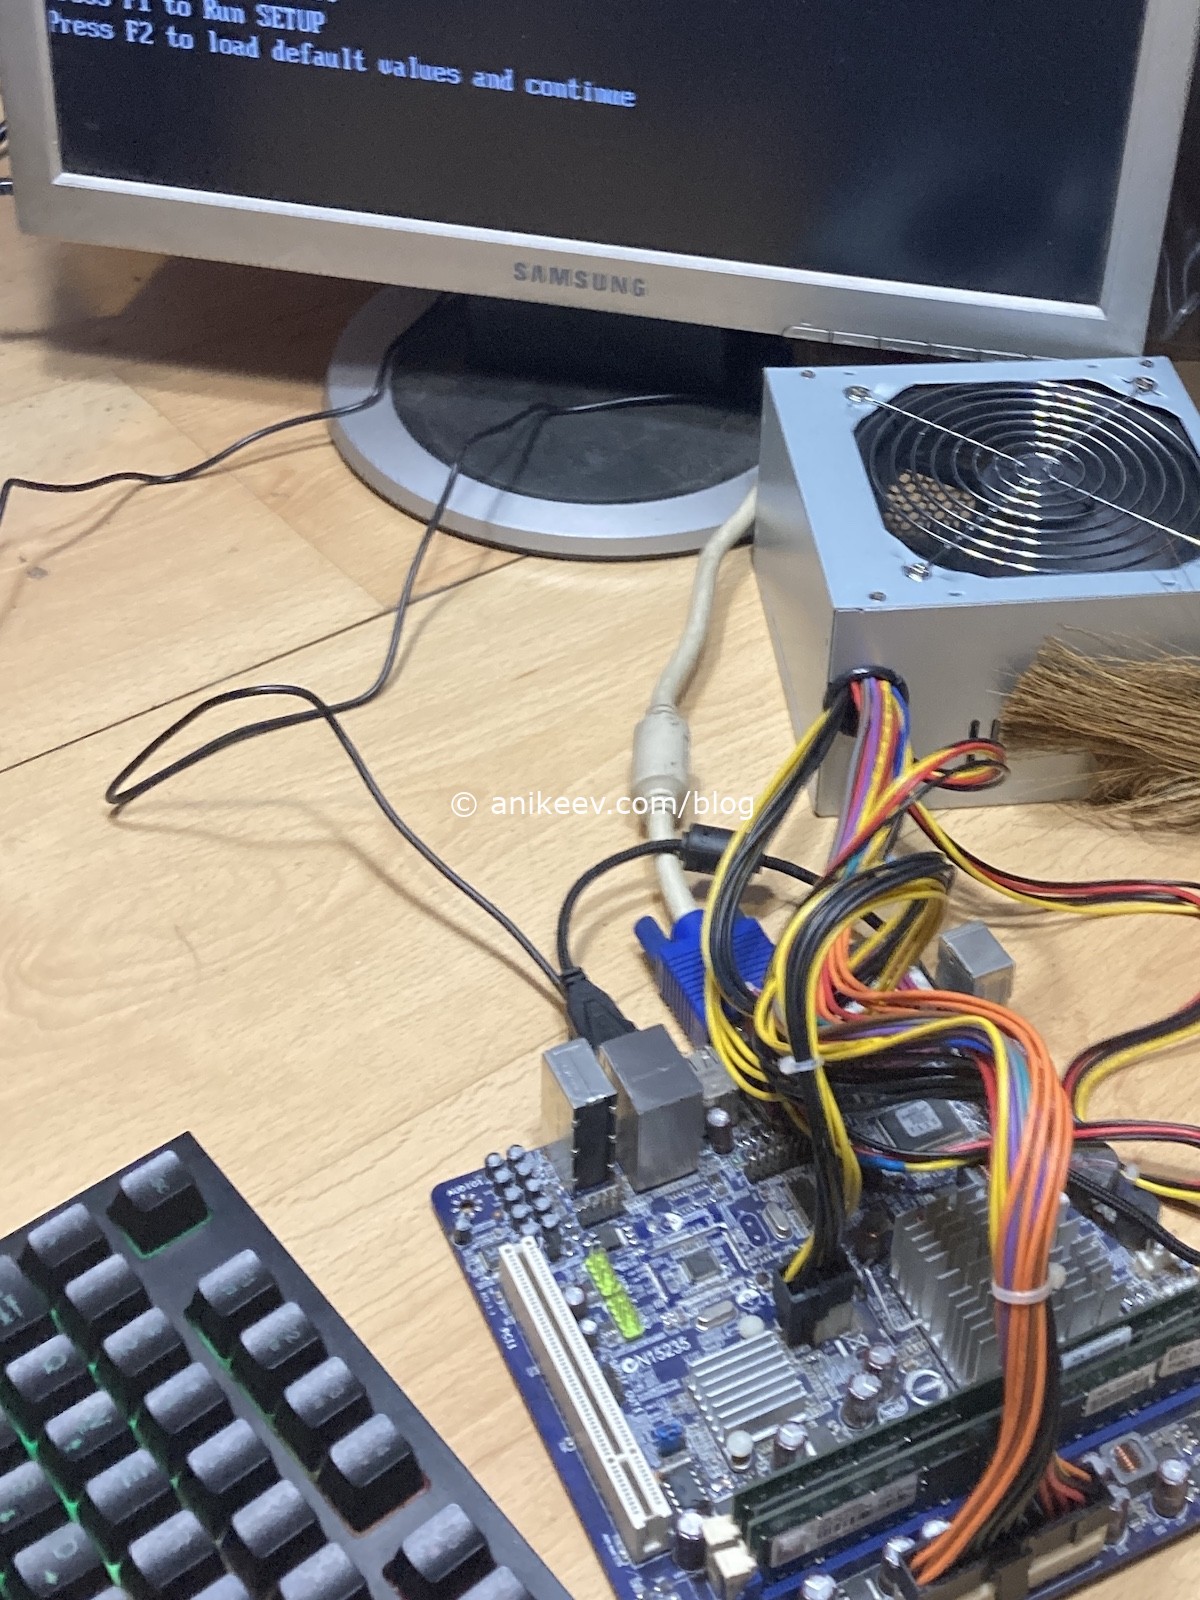 My NAS based on mini-itx board by Foxconn with soldered Intel atom CPU, two DDR2 RAM slots, two SATA-ports. One PCI expansion slot and standard ATX power connector.
CPU for NAS should be ice cold, have at least two cores and have an x64 architecture. There’s no choice for me, because Intel Atom D425 soldered on board.
 RAM for NAS should be build with as more modules as possible. All of them should have same volume, frequency and timings. For my setup it’s a pair of 1 GB RAM modules. And yes, 2 GB is enough for NAS. Even 1 GB is enough for NAS, if you’re running it on Linux. For running Windows you should have at least 4 GB.
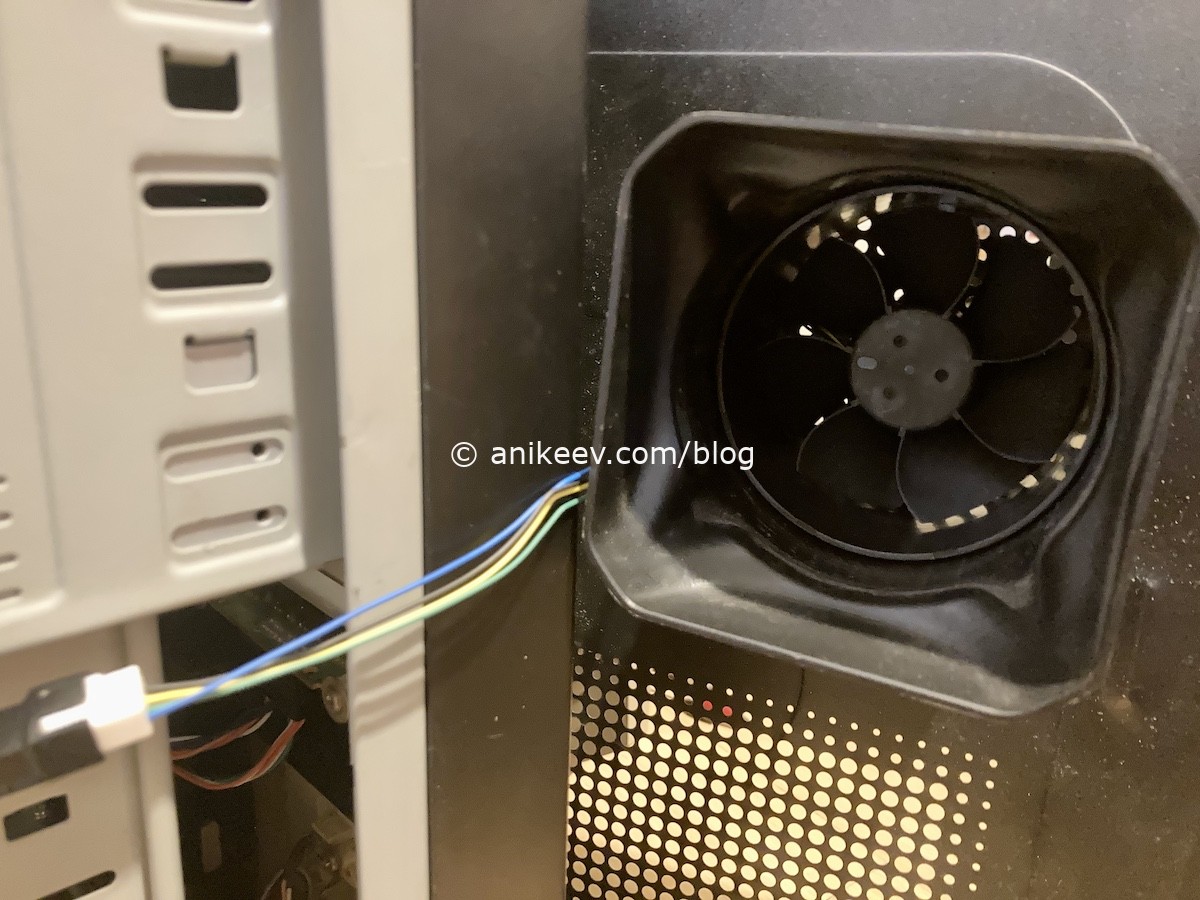
NAS cooling is a DIY in my case. I couldn’t get any fan that fits my radiator, so I took an old airpipe and combined it with an Intel box cooler’s fan. Now I have 4-pin automatically controlled cooling.
 Power supply for NAS — any will fit. You can use 300W office-oriented PSU, it’s cheap. It’s better to buy noname and fresh PSU than well-known brand but old and used. Make sure it has big fan — it’s less noisy.
PC Case for NAS should be as standard and cheap as possible. Old cases have big and roomy cage fore drives and PSU is installed on top of motherboard to help air leave the case. You don’t need USB and audio outs, screwless construction and all that stuff. Make sure that reset and power-on buttons are working and all LED indicators are neutral colour (not that blue superbright crap)
You might think that a case for network storage should be very compact, stylish and beautiful. If you are not ready to assemble a NAS in a regular case, go buy NAS in the store. A non-standard case will not be the cheapest, it will require certain hardware that’s hard to replace. Unification is everything!
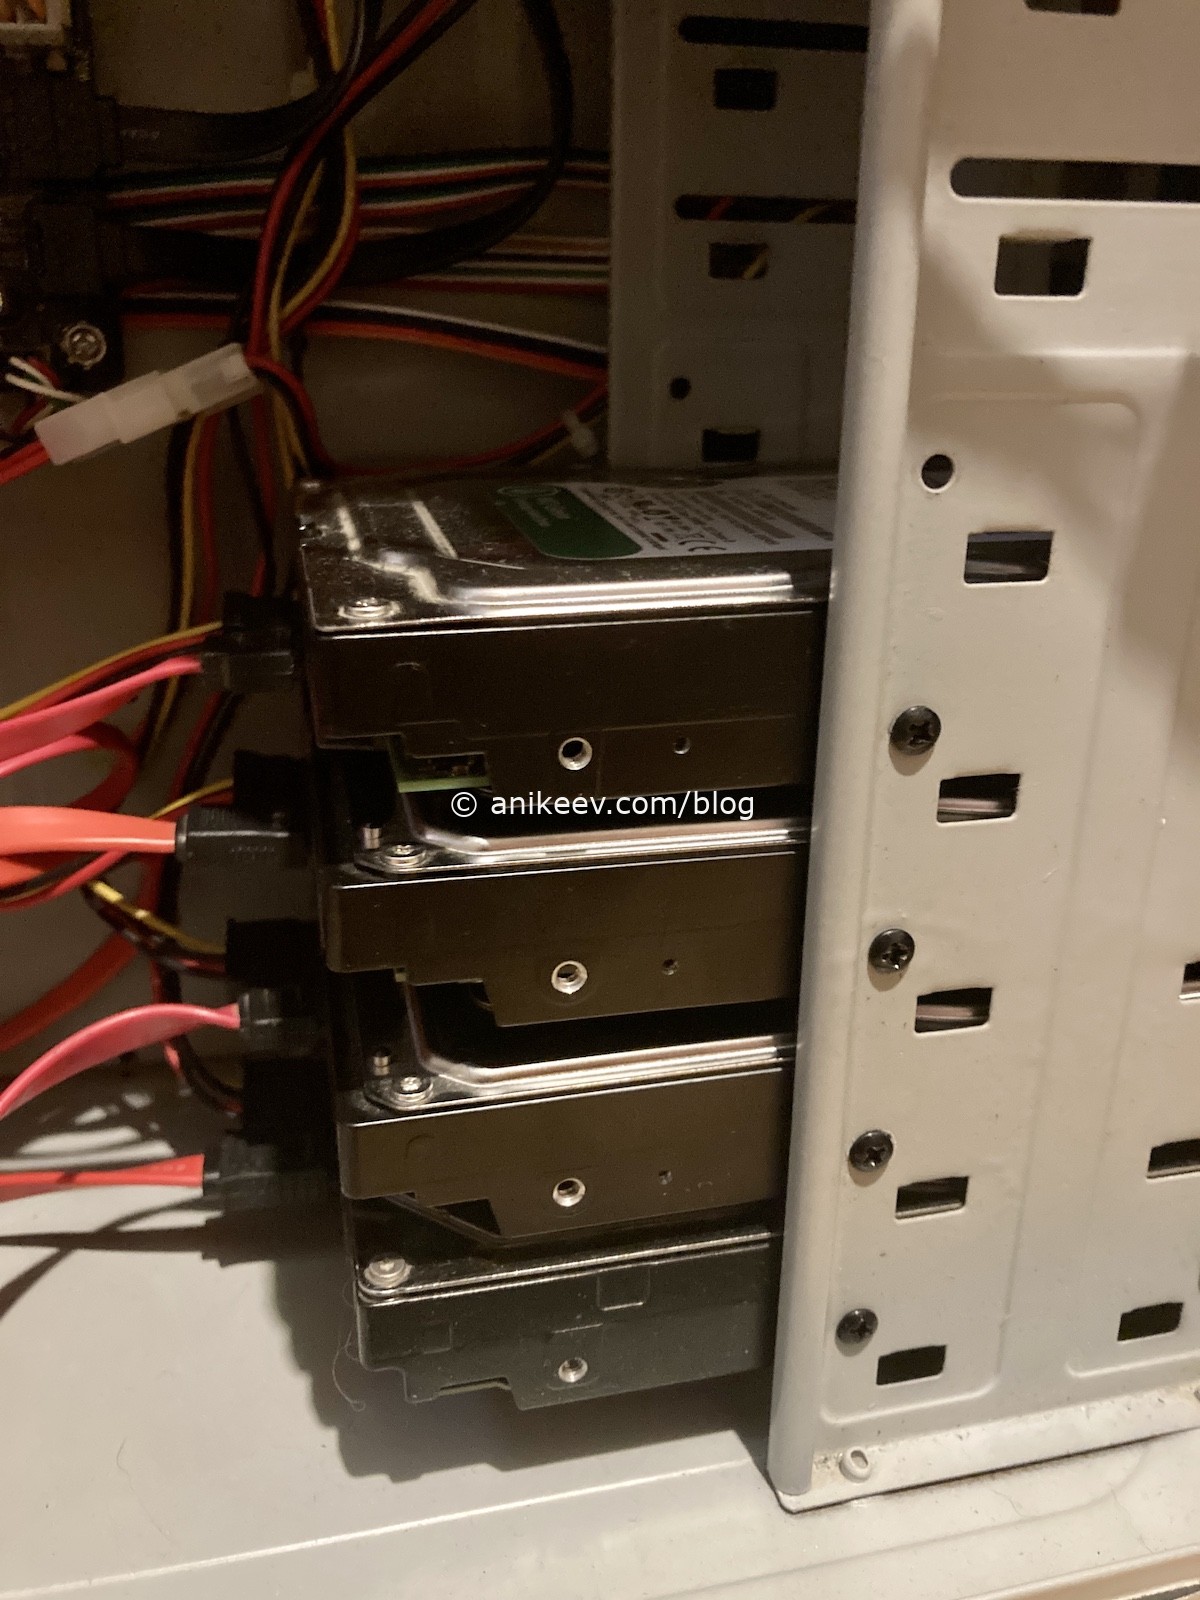
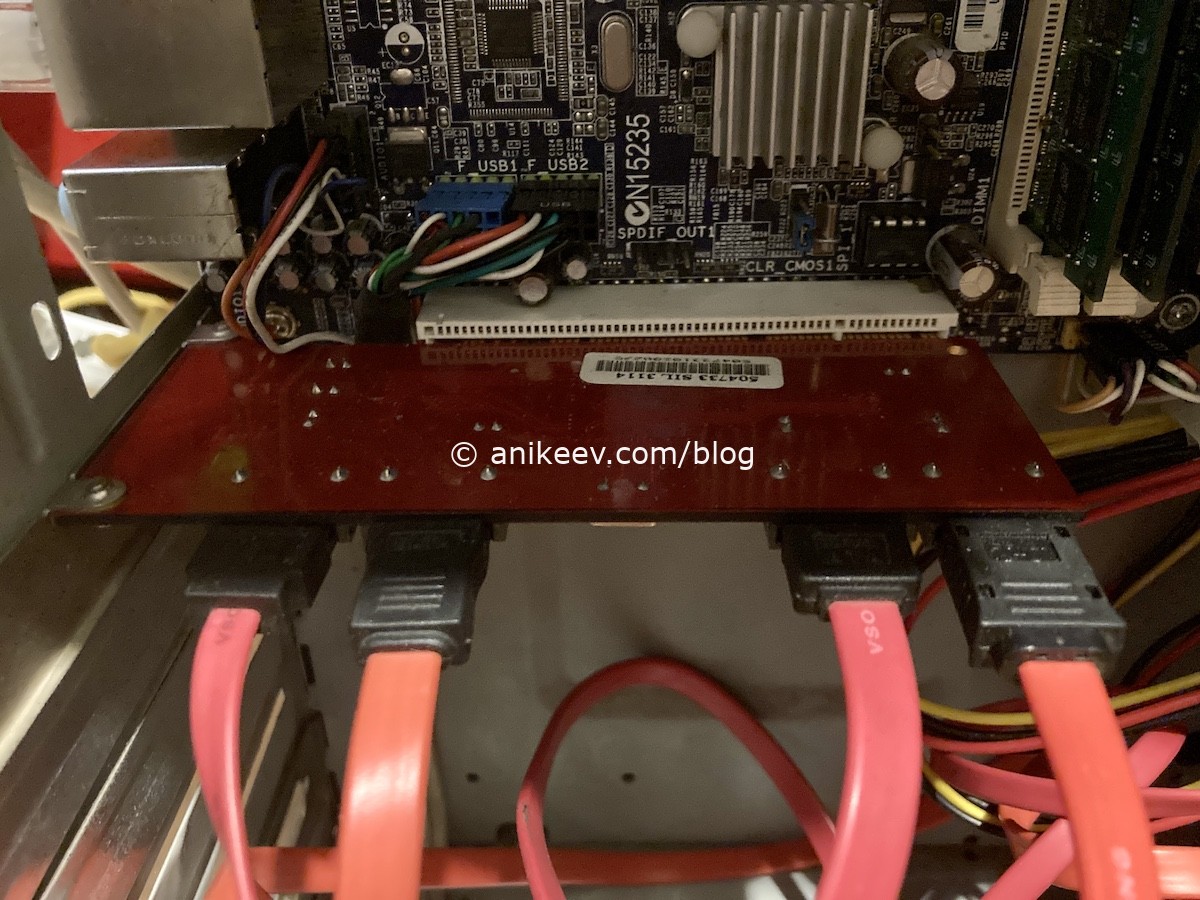 SATA-controller for NAS. First, I had a controller. Secondly, I had to connect four disks at once (I had them already too), and there were only two SATA on the motherboard. The Sata controller will allow, among other things, to create a hardware RAID array, which will be seen by any system as a single space. I DO NOT RECOMMEND hardware RAID. If the controller dies, you will have to look for exactly the same one, the chances of data recovery will be lower. Regular soft-RAID is better. And it’s better to boot from a drive that is connected to the motherboard.
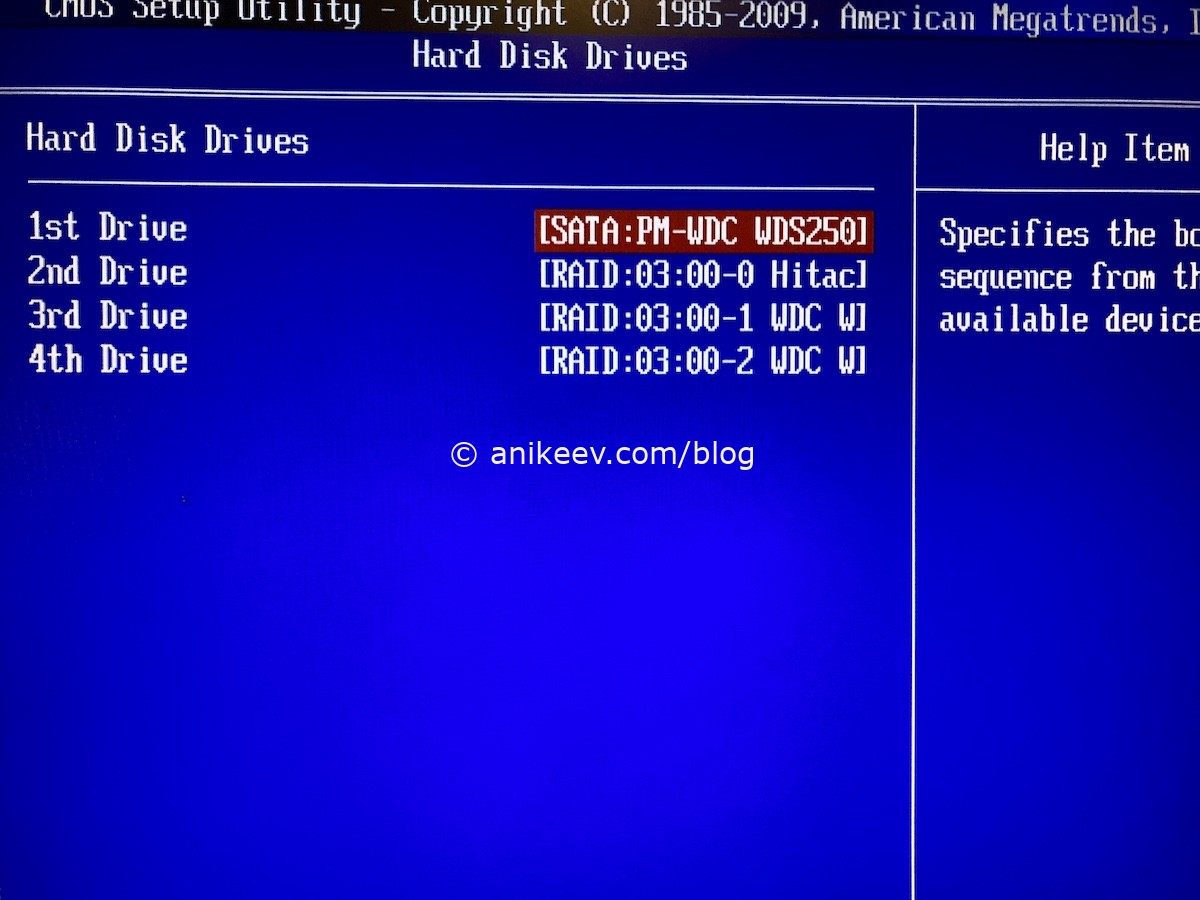 Hard drives for network storage, I used the ones that I had. A pair of 2 TB disks for important data in the mirror, one disk with a bad smart (S.M.A.R.T. — self-monitoring, analysis and reporting technology) of 2 TB for unimportant data in read-only format and another 1 TB for everyday use.
Last step: setting up BIOS
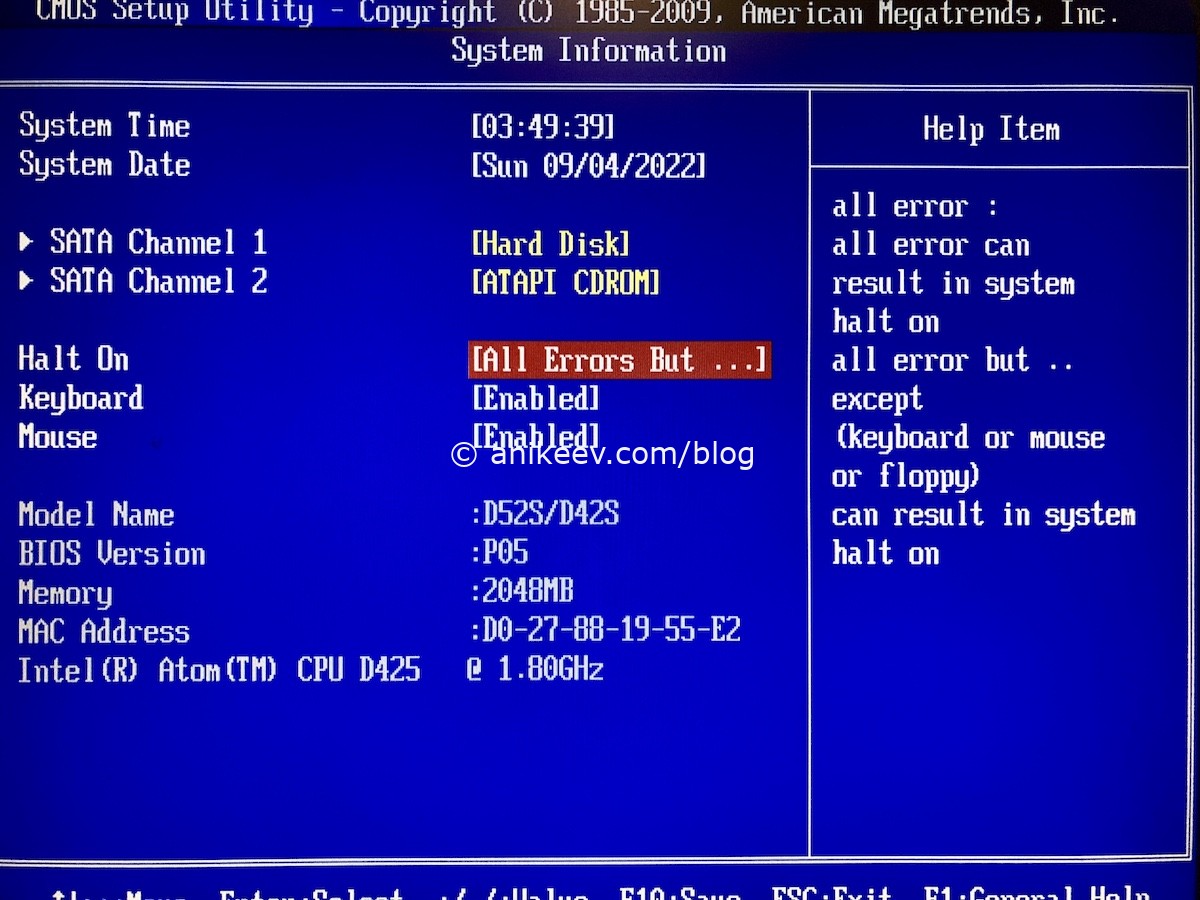
Before system install and all that set-up, you should set some settings in BIOS:
- Halt on errors = NONE — this option prevents the board from stop booting the system when some errors occur, such as an unconnected keyboard, a missing monitor, and so on. This option is usually enabled in All mode, which is not a problem at all for a normal computer. But we need to force the NAS-computer to turn on only with the power and network cable connected, without everything else. So you need to switch the option to None. Not all boards have the ability to disable error checking completely, so be careful..
In my BIOS settings a bit different, so I choose «All but».
 Read hints carefully. In my case «enabled» means device can not result in system halt on.
- Restore on AC power loss = Power on — the Restore on AC power loss parameter specifies how the computer behaves when power is applied after a power outage. In our case, you need to set Power on so that the self-assembled NAS turns on itself after a power outage. Alternatively, you can select the Last state option, which translates as «do as it was». This is a convenient option for rarely used network storages: if the Last state value is set, the NAS will turn on after a power outage only if it worked before it, but if it was turned off, it will remain off.
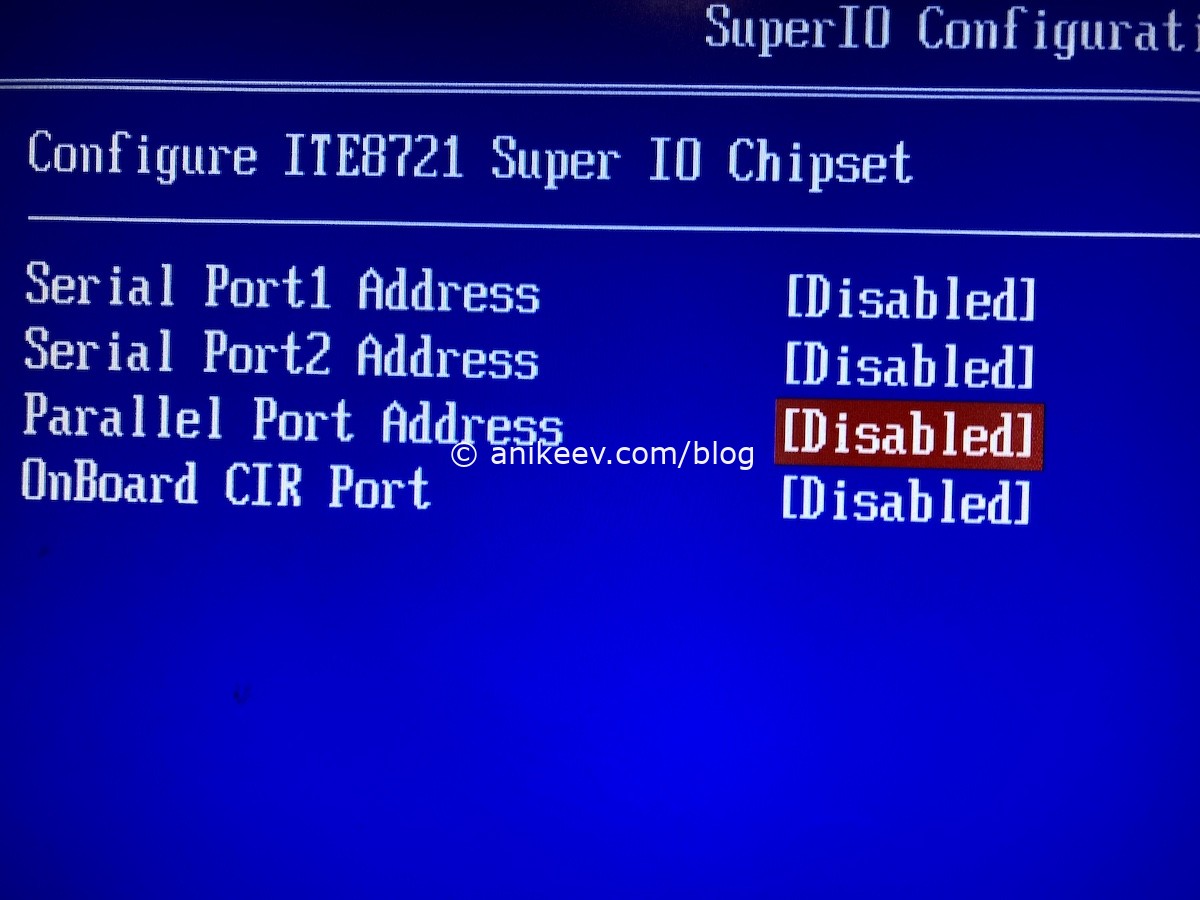
 Other parameters can be changed (or not changed) as needed. For example, you can enable the hot swap option for individual SATA connectors in order to remove the disk without shutting down the computer (I did this on a Windows machine). You can disable USB ports, unused controllers such as COM, Floppy and LPT, hardcode the boot drive and password-protect the BIOS entry so no one changes anything.
 On newer motherboards, you can play around with fan speed curves to cool better and quieter. All these settings are optional, and there are exactly two must-haves: be able to turn on after a power loss and be able to turn on without connected peripherals. That’s it, we assembled the NAS and set up the hardware itself in a basic way.